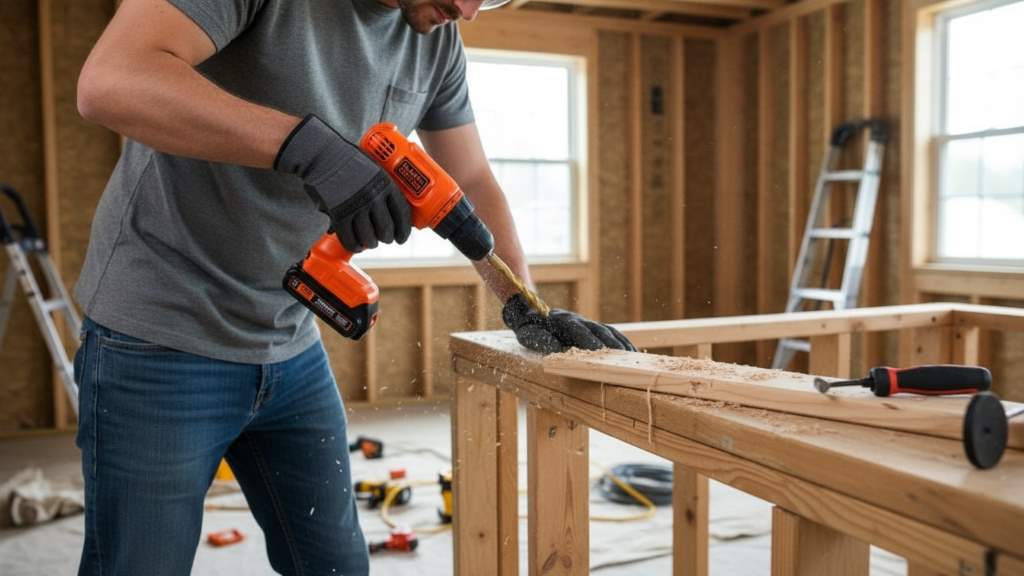
Imagine facing a loose cabinet door that swings every time you open it. You grab your tools and fix it in minutes. That sense of accomplishment comes from having the right equipment. The BLACK+DECKER 100-Pc Drill Kit turns everyday home fixes into simple tasks. This versatile set helps beginners and seasoned DIY fans tackle repairs with ease. For instance, you can drill holes for shelves or drive screws into furniture without hassle. Check out the BLACK+DECKER Drill Kit to see its full potential. According to the U.S. Census Bureau, homeowners spent $827 billion on improvement projects from 2021 to 2023. Moreover, the share of DIY efforts stands at 36 percent. Another study shows 87 percent of millennial homeowners deal with unfinished repairs. With this kit, you step up your game and complete those jobs yourself.
Understanding Your BLACK+DECKER 100-Pc Drill Kit
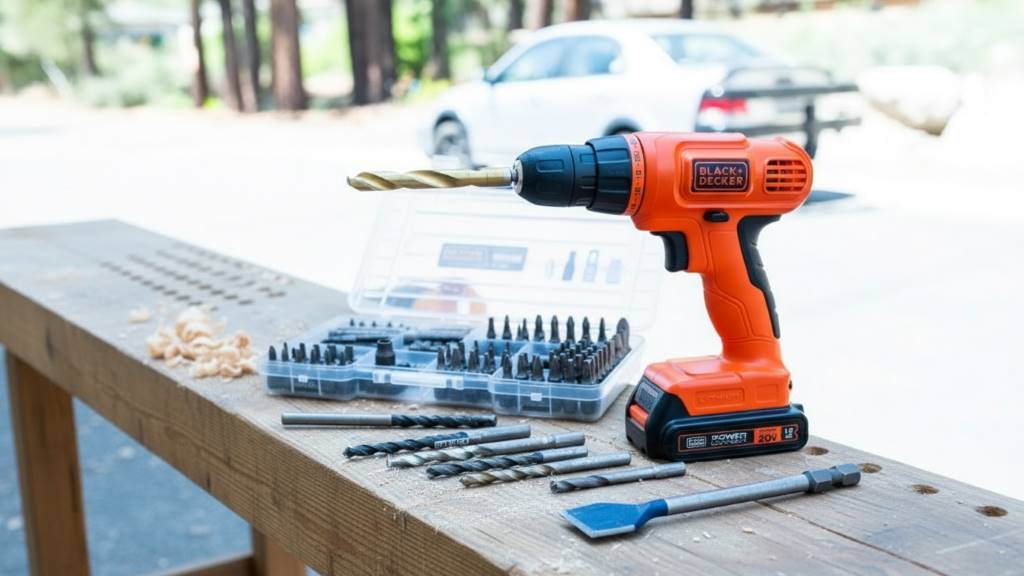
First, get familiar with what this drill set offers. The kit centers on a 20V MAX cordless drill. It weighs just over four pounds with the battery. You hold it comfortably thanks to the soft-grip handle. Additionally, the design fits tight spaces well.
Next, explore the 100 pieces included. You find drill bits for wood, metal, and plastic. Screwdriver bits come in various heads like Phillips and flat. Nut drivers help with bolts. A magnetic bit holder keeps things secure. Everything stores in a zippered case, though it lacks compartments.
Furthermore, key features boost performance. The drill reaches 750 RPM for quick work. A 24-position clutch controls torque precisely. This prevents stripping screws. The lithium-ion battery holds charge for up to 18 months when idle. Plus, it swaps with other BLACK+DECKER tools.
Overall, this setup suits home use perfectly. Beginners appreciate the ease. Experienced users value the reliability. So, you handle most household tasks without extra buys.
Setting Up Your Drill Kit for First Use
Start by unboxing carefully. Lay out all items on a flat surface. Check for any missing parts. The drill arrives with the battery separate. Insert it until it clicks.
Then, charge the battery fully. Plug the charger into a wall outlet. Connect it to the battery. A light shows charging status. It takes about three and a half hours. Meanwhile, organize the bits.
After charging, attach a bit. Open the chuck by twisting counterclockwise. Insert the bit firmly. Twist clockwise to tighten. Test by pulling gently.
Finally, power on the drill. Squeeze the trigger lightly. Listen for smooth operation. Adjust speed with pressure. Now, you stand ready for repairs.
Basic Operations: Drilling and Driving Screws
Begin with drilling basics. Select the right bit for your material. For wood, use twist bits. Metal needs high-speed steel. Secure your workpiece with clamps.
Position the drill perpendicular. Apply steady pressure. Start slow to create a pilot hole. Increase speed as needed. Pull out periodically to clear debris.
Switch to driving screws next. Choose a screwdriver bit that matches the screw head. Set the clutch to a low number for soft materials.
Align the screw and press the trigger. Let the drill do the work. Stop when the screw sits flush. Adjust clutch higher for tougher jobs.
Practice on scrap pieces first. This builds confidence. Soon, you complete tasks like mounting brackets effortlessly.
Safety First: Essential Tips for Using Your Drill
Always prioritize safety. Wear safety glasses to protect your eyes. Add a dust mask for fine particles. Gloves fit snugly to avoid slips.
Keep the work area clear. Secure loose clothing and tie back hair. Remove jewelry that might catch.
Inspect the drill before use. Check cords for frays if applicable. Ensure bits stay sharp and clean.
Clamp materials down. This prevents movement. Hold the drill with both hands for control.
Avoid wet conditions. Water and electricity mix poorly. Unplug or remove battery when changing bits.
Follow these steps every time. They reduce risks. You enjoy repairs without incidents.
Common Home Repair Projects with Your Drill Kit
Tackle hanging shelves first. Measure and mark wall spots. Drill pilot holes for anchors. Drive screws to secure brackets. Level the shelf and attach.
Assemble furniture next. Flat-pack items need screws. Use the magnetic holder for bits. Set clutch low to avoid over-tightening. Build tables or chairs quickly.
Install curtain rods easily. Locate studs with a finder. Drill holes at marked points. Insert anchors if needed. Screw brackets in place. Hang curtains smoothly.
Fix loose cabinet doors. Remove old screws. Drill new pilot holes slightly larger. Drive longer screws for better hold. Doors swing properly again.
Build a simple deck repair. Replace rotted boards. Drill holes for new screws. Drive them flush. Secure railings too. Your outdoor space improves.
Hang light fixtures safely. Turn off power first. Drill mounting holes. Use appropriate bits for ceiling material. Screw the base securely. Connect wires carefully.
Refinish furniture with ease. Drill holes for new hardware. Remove old paint with sanding attachments if available. Drive screws for legs or handles.
Mount TV brackets firmly. Find wall studs. Drill precise holes. Use level for alignment. Drive heavy-duty screws. Enjoy your setup.
Repair fences outdoors. Drill holes in posts. Drive screws to attach panels. Use weather-resistant bits. Fences stand strong again.
Install baby gates securely. Mark drill points. Use plastic anchors for walls. Drive screws gently. Gates keep kids safe.
Each project adds value. You save time and effort. Plus, skills grow with practice.
Hanging Wall Art and Mirrors
Start small with art. Measure heights evenly. Drill holes for hooks. Use masonry bits for brick walls. Drive anchors if weighty.
For mirrors, ensure stability. Double-check levels. Drill multiple points. Secure with strong screws. Reflections stay perfect.
Assembling Kids’ Toys and Playsets
Gather parts first. Follow instructions closely. Drill pilot holes in plastic or wood. Drive screws without cracking. Kids play sooner.
Outdoor sets need care. Use rust-resistant bits. Secure joints tightly. Structures hold up to fun.
Repairing Drywall Damage
Patch holes easily. Cut repair pieces. Drill screws around edges. Cover with compound. Sand smooth later.
For larger fixes, add supports. Drill into studs. Drive screws to hold backing. Walls look new.
Installing Door Hardware
Upgrade locks quickly. Remove old ones. Drill new holes precisely. Drive screws for plates. Doors function better.
Handles follow similar steps. Align properly. Tighten without wobble. Entryways feel secure.
Building Custom Shelving Units
Plan dimensions first. Cut wood to size. Drill pocket holes for joins. Drive screws hidden. Units fit spaces perfectly.
Add brackets for support. Drill wall holes. Secure everything level. Storage increases nicely.
Fixing Squeaky Floors
Locate joists below. Drill pilot holes through floor. Drive long screws into joists. Squeaks vanish quietly.
Carpeted areas need care. Lift edges gently. Secure and replace. Floors stay silent.
Mounting Window Treatments
Blinds install fast. Mark bracket spots. Drill holes accurately. Drive screws firmly. Windows dress up.
Shades follow suit. Adjust for light control. Secure mechanisms. Rooms gain privacy.
Repairing Garden Structures
Trellises mend easily. Drill new holes in posts. Drive screws for slats. Plants climb steadily.
Benches fix similarly. Replace loose legs. Secure with nuts and bolts. Seating lasts longer.
Installing Bathroom Fixtures
Towel racks attach simply. Find studs or use anchors. Drill holes carefully. Drive screws flush. Bathrooms organize.
Shelves add storage. Measure spaces. Secure brackets. Items stay handy.
Outdoor Lighting Setup
Path lights need posts. Drill bases into ground if wood. Drive screws for fixtures. Nights brighten safely.
Wall lights mount on siding. Use appropriate bits. Secure tightly. Exteriors glow.
With these projects, your home transforms. Each success motivates more. You become the go-to fixer.
Related:
Advanced Tools Used by Plumbing Companies Near Me
Construction tools used for laying concrete
Advanced Techniques for Better Results
Master torque settings. Lower numbers suit soft woods. Higher for metals. Adjust to avoid damage.
Use specialty bits. Spade for large holes. Countersink for flush screws. Expand your capabilities.
Combine with other tools. Pair with levels for accuracy. Sanders smooth after drilling.
Experiment on scraps. Test settings. Refine techniques. Projects turn professional.
Incorporate speed control. Slow for starting. Fast for finishing. Precision improves.
These methods elevate work. Simple repairs become crafts. Satisfaction grows.
Maintenance and Care for Longevity
Clean after each use. Wipe debris from the drill. Use compressed air on vents.
Lubricate the chuck occasionally. Apply light oil. Twist to distribute. Mechanism stays smooth.
Store in the case. Keep bits organized. Avoid moisture. Tools last longer.
Charge battery properly. Avoid overcharging. Remove when full. Performance holds.
Inspect regularly. Check for wear. Replace dull bits. Reliability remains high.
Follow these habits. Your kit serves for years. Repairs continue without issues.
Troubleshooting Common Issues
Battery not charging? Check connections. Clean contacts. Try another outlet.
Drill slips? Tighten chuck fully. Use sharp bits. Grip improves.
Overheating occurs? Pause during heavy use. Clean vents. Cool down.
No power? Ensure battery insertion. Charge fully. Function returns.
Bit stuck? Reverse direction. Pull gently. Release happens.
Address problems quickly. Tools work again. Frustration minimizes.
Conclusion
You now know how to harness the BLACK+DECKER 100-Pc Drill Kit for various home repairs. From setup to advanced tips, each step builds your skills. Safety and maintenance keep everything smooth. Common projects like hanging shelves or fixing doors become routine. Remember the features like the 24-position clutch for precision. With practice, you handle more tasks confidently. Grab your kit today and start that pending repair. Your home thanks you.
FAQs
What materials can I drill with this kit?
You drill wood, metal, and plastic easily. Select appropriate bits for each. The kit provides variety for household needs.
How do I change bits quickly?
Open the chuck by twisting. Insert the new bit. Tighten securely. Practice makes it fast.
Is the battery interchangeable?
Yes, it works with other BLACK+DECKER PowerConnect tools. This saves on extras.
What if the drill makes unusual noises?
Stop use immediately. Check for loose parts. Clean debris. Consult manual if persists.
Can beginners use this kit?
Absolutely. Simple design helps starters. Follow tips for success.
References