You have invested in a high-modulus polyethylene (HMPE) rope like Amsteel because you need strength without the weight. But how do you actually test Amsteel rope under load to confirm it is safe for your critical application? The problem is that Amsteel behaves differently than polyester or nylon—it has very little stretch and a high susceptibility to creep under sustained loads. If you don’t test it correctly, you risk catastrophic failure. This guide provides a practical, safety-focused method to evaluate your Amsteel rope under real tension, helping you avoid expensive mistakes.
Why Is Testing Amsteel Under Load Different from Testing Other Ropes?
The Unique Properties of HMPE Fibers
Amsteel is made from Dyneema or similar UHMWPE fibers. Unlike nylon, which can stretch 20–30% before breaking, Amsteel stretches less than 3% at break. This lack of elongation means you cannot rely on visual “stretch” indicators to gauge load. You must use precise measurement tools rather than guesswork.
The Danger of Creep and Static Loads
Amsteel performs poorly under long-term high static loads. If you leave Amsteel under 50% of its breaking strength for extended periods, the fibers will slowly elongate and eventually fail. Testing must account for this by using short-duration dynamic loads or by monitoring for creep during the test cycle.
Knots vs. Splices in a Test Environment
Knots reduce Amsteel’s strength by 30–50%. When you test Amsteel under load, you must use properly spliced eyes or specialized terminations. Testing a knotted Amsteel rope tells you nothing about the rope’s inherent strength—it only tests the weakness of the knot.
New Rope vs. Used Rope Testing
New Amsteel has predictable strength. Used Amsteel may have internal abrasion or UV damage that is invisible to the naked eye. Testing protocols should include a baseline test on a known-good new sample, then compare results from your in-service rope.
What Equipment Do You Need to Safely Test Amsteel Under Load?
Load Cell or Dynamometer
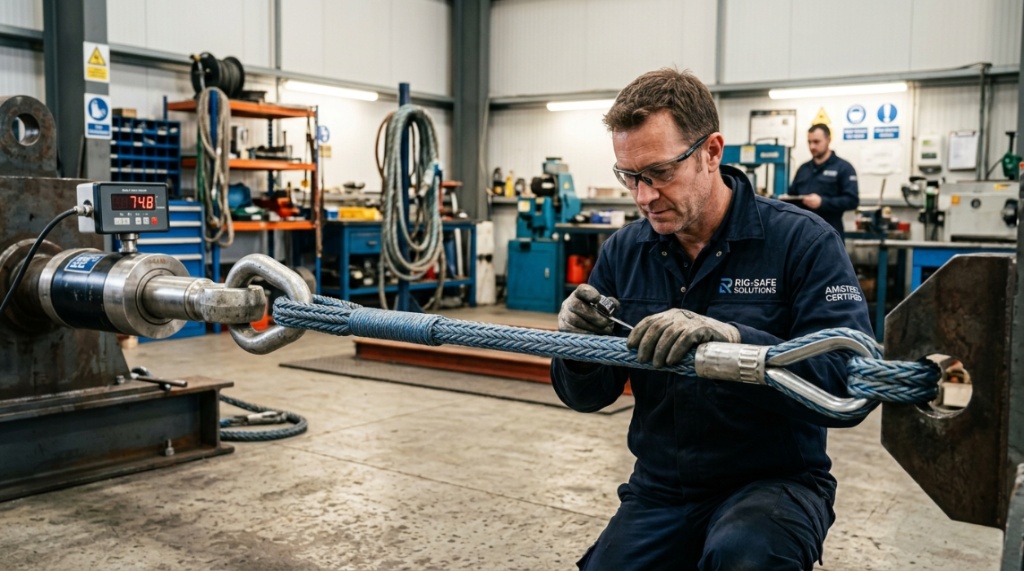
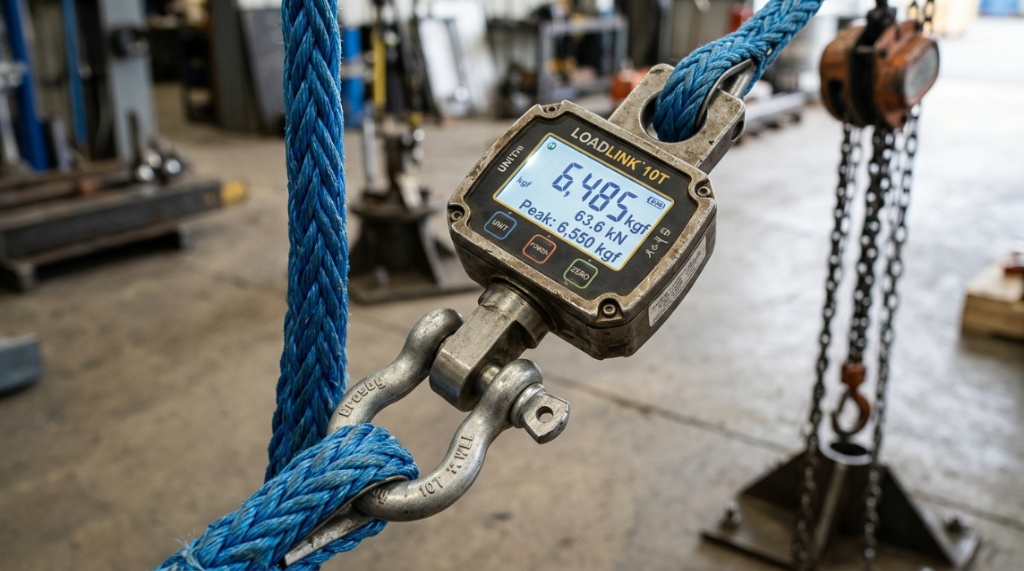
A calibrated load cell is non-negotiable. You need a device that measures tension in real time. Digital dynamometers with data logging are ideal. Avoid spring scales—they lack the accuracy required for the high-strength/low-elongation profile of Amsteel. A load cell with ±1% accuracy is the minimum.
Proper Thimbles and Shackles
Amsteel is soft and can be cut by sharp edges. Use polished stainless steel thimbles inside your spliced eyes. Attach the rope to the test frame using screw-pin shackles rated for at least 2 times your expected maximum test load. Never use sharp hooks or hooks with narrow throats.
Controlled Tension Source
A hydraulic cylinder or a winch with a variable speed control is best. Manual come-alongs are acceptable for low-load tests, but they introduce jerking motions that can spike the load suddenly. A smooth, progressive application of tension is critical to getting accurate data.
Safety Barriers and PPE
If Amsteel fails under load, it does not snap back like a rubber band. It shatters into fine fibers that can reach high velocities. Always use blast-rated barriers, wear cut-resistant gloves, and safety glasses. Treat the test area as a no-zone for untrained personnel.
How Do You Prepare a Test Sample of Amsteel Rope?
Selecting the Right Sample Length
Test samples should be at least 10 feet long between termination points. Shorter lengths do not allow the rope to seat properly in the splice or termination, leading to artificially low break strengths. Longer lengths are acceptable but require stronger test frames.
Inspecting the Splice Quality
The splice is the weakest point in any Amsteel assembly. Inspect the splice visually. Each tail should be buried at least 72 times the rope diameter (per Samson’s recommendation). Tug the splice by hand before testing. If you see any gaps or exposed tail ends, re-splice the sample.
Pre-Tensioning the Rope
Before you take your first data point, cycle the rope to 10% of its rated breaking strength three times. This “seats” the fibers and removes any construction stretch that might distort your low-load measurements. After pre-tensioning, inspect the rope again for any signs of damage.
Marking the Gauge Length
Use a permanent marker to place two reference marks on the rope, spaced exactly 12 inches apart in the center of the test sample. After loading, you can measure the distance between these marks to calculate the actual elongation percentage. This is your most reliable indicator of performance.
What Is the Step-by-Step Process to Test Amsteel Rope Under Load?
Step 1: Set Up Your Test Frame
Attach one end of your Amsteel sample to a rigid anchor point using a properly rated shackle. Connect the other end to your load cell. Ensure the rope runs in a straight line between anchor and load cell—any angles will introduce side loads that skew the results.
Step 2: Apply Load Incrementally
Increase tension in 10% increments of the rope’s rated breaking strength. For a 10,000-pound rated Amsteel, increase the load by 1,000 pounds at a time. Pause at each increment for 10 seconds. This allows you to record the load reading and inspect the rope visually for any abnormalities.
Step 3: Record Creep at High Loads
When you reach 50% of the rated breaking strength, hold the load constant for 60 seconds. Measure the distance between your gauge marks again. If the rope continues to elongate under a constant load, that is creep. Any measurable creep at 50% load signals potential weakness.
Step 4: Controlled Unloading
After reaching your maximum test load (never exceed 80% of the rated breaking strength), do not release the load suddenly. Reduce tension in the same 10% increments you used to load the rope. Sudden unloading can cause the rope to whip violently and damage your equipment.
Step 5: Post-Test Inspection
After unloading, examine the rope from end to end. Feel for soft spots, which indicate internal fiber damage. Look for any powder or fluff on the surface—this indicates abrasion. Measure your gauge marks again. If the permanent elongation exceeds 2%, the rope has been structurally compromised.
Which Load Limits Should You Never Exceed When Testing Amsteel?
The 80% Rule for Destructive Testing
If you need to confirm the exact breaking strength of a sample for research purposes, you can load to failure. However, for routine safety verification, never exceed 80% of the rated breaking strength. Testing to 80% gives you high confidence in the rope’s capability without risking sudden failure during the test.
The 50% Rule for Static Holding Tests
For applications where the rope will hold a static load for hours or days, your test load should not exceed 50% of rated breaking strength. This leaves a safety margin against creep. If the rope shows any elongation after a 60-second hold at 50%, do not use it for static applications.
The 30% Rule for Cyclic Fatigue Tests
If you plan to test Amsteel under repeated loading cycles (like a winch line), keep cycle loads below 30% of breaking strength. Frequent cycling above this threshold creates heat and internal fiber fatigue that dramatically shortens rope life. Test for 500 cycles minimum to assess durability.
Sheave Diameter Verification
When testing Amsteel over a sheave or pulley, the sheave diameter must be at least 20 times the rope diameter. Testing over a smaller sheave introduces bending stress that reduces effective strength by 20–40%. Measure your sheave before the test and document the ratio.
How Do You Interpret the Results of Your Amsteel Load Test?
Reading the Load Curve
Plot your recorded loads versus elongation. A healthy Amsteel rope shows a steep, linear curve. Any sudden flattening of the curve indicates fiber breaking. If the curve starts to level off below 80% load, the rope is compromised. Discard it immediately.
Comparing to the Manufacturer’s Spec Sheet
Every batch of Amsteel comes with a manufacturer’s test certificate. Your test results should be within 5% of the certificate values. If your test shows strength 10% or more below the spec, the rope may have been damaged in storage, handling, or prior use. Consider it unsafe. Just as you need absolute confidence in high-strength rigging before putting gear under heavy tension, ensuring structural integrity is equally vital for water sports equipment—learn how to improve repair quality with a proper surfboard stand for your maintenance projects.
Identifying Fibrillation
After the test, run your finger along the rope length. If you feel loose fibers sticking out, or if the rope appears fuzzy, that is fibrillation. Fibrillation indicates that the fibers have broken internally. A rope with any visible fibrillation after a load test should be retired.
Documenting for Future Comparison
Log every test: date, rope diameter, batch number, splice condition, maximum load, elongation percentage, and any visible anomalies. This historical data becomes your baseline for future tests. If a rope from the same batch tests lower six months later, you know degradation is occurring.
Can You Test Amsteel Under Load Without Specialized Equipment?
The Deadweight Test Method
For small-diameter Amsteel (1/8-inch or less), you can perform a simple deadweight test. Suspend the rope vertically from a secure anchor. Add weight plates gradually. Use a scale to weigh each plate. This is slow and imprecise, but it works for low-load verification of knots or splices.
The Boat Bumper Method
Boating enthusiasts sometimes test Amsteel dock lines by tying the rope to a fixed dock and pulling with a boat while watching a tension gauge. This method is dangerous because water conditions change the load unpredictably. It should only be used for rough approximations and never for life-safety applications.
Commercial Test Services
If you do not have access to load cells or hydraulic equipment, send your rope to a commercial testing laboratory. Many marine rigging shops offer rope testing services for a fee. The cost is small compared to the risk of using an untested rope in a critical application.
When DIY Testing Is Not Enough
For any application involving human safety (rigging, climbing, rescue), amateur test methods are unacceptable. Use only calibrated equipment with documented procedures. The risk of a false positive—believing the rope is safe when it is not—is too high with imprecise methods.
What Are the Common Mistakes When Testing Amsteel Under Load?
Mistake 1: Testing Without Splices
Some people tie a knot in Amsteel and pull it to see how much weight it holds. This gives you the strength of the knot, not the rope. A properly spliced Amsteel rope can hold 100% of the rated load. A knotted Amsteel rope may fail at half that load. Always test with splices.
Mistake 2: Ignoring Temperature Effects
Amsteel loses strength as temperature rises. At 150°F (65°C), it retains only about 80% of its room-temperature strength. If your test environment is hot—like a sun-baked dock or a hot garage—your test results will be artificially low. Document the temperature during every test.
Mistake 3: Testing at the Wrong Speed
Applying load too quickly (faster than 1 inch per minute for a 10-foot sample) creates dynamic shock loads that spike far above your target. Apply tension slowly and steadily. For hydraulic testers, set the ram speed to the lowest practical setting.
Mistake 4: Reusing Test Samples
Once you have loaded an Amsteel rope above 50% of its breaking strength, the internal structure has changed. Do not reuse that sample for another test. Discard it or cut it into short pieces for abrasion testing or splice practice.
For a reliable supply of high-quality, affordable Amsteel rope that is ready for testing, you can test Amsteel rope under load using samples from Yifarope, which offers consistent diameters and documented batch certifications.
Frequently Asked Questions
How many times can I test the same Amsteel rope section?
You should only test a given section of Amsteel once. Repeated loading above 50% of breaking strength creates cumulative internal damage. After any load test exceeding that threshold, retire the rope or cut out the loaded segment and re-splice.
Can I test Amsteel rope that is wet?
Yes. Amsteel does not absorb water, so wet rope has the same breaking strength as dry rope. However, water can hide surface damage. Dry the rope thoroughly before inspecting for fibrillation or abrasion after the test.
What is the difference between testing for breaking strength and testing for working load?
Breaking strength testing loads the rope to failure to find its absolute maximum. Working load testing loads the rope to a safe percentage (typically 20–30% of breaking strength) to confirm it can handle typical service conditions. Most users need working load verification, not destruction.
Is it safe to use a car or truck to pull on an Amsteel rope for testing?
No. Using a vehicle introduces uncontrolled variables: wheel slip, engine surging, and the possibility of the load releasing suddenly and sending the rope through the vehicle’s rear window. Always use a stationary test frame with controlled hydraulic or winch tension.
How do I know if my Amsteel splice is good enough for testing?
A good splice is smooth, flexible, and at least 72 times the rope diameter in bury length. The tail should not slip when hand-tugged. If you have any doubt, have an experienced rigger inspect the splice, or use a commercial splicing service.
Can I test Amsteel rope with a digital luggage scale?
For very light tests (under 100 pounds), a digital luggage scale can work for rough checks. For any load above that, the plastic components in consumer scales are unreliable. Use a proper load cell with a steel housing for any meaningful test.
What does a safe Amsteel test look like after loading?
A safe test results in a rope that shows no visible damage, no permanent elongation beyond 1%, and a consistent smooth texture. The rope should look and feel exactly the same as it did before the test. Any change in appearance or feel indicates damage.